Installing Skippership on your WordPress website is quick and easy using the Simple Custom CSS and JS plugin. By the end of this guide, you'll have Skippership tracking code added to your website and can start recording visitor sessions to understand how users interact with your content.
Copy your tracking code
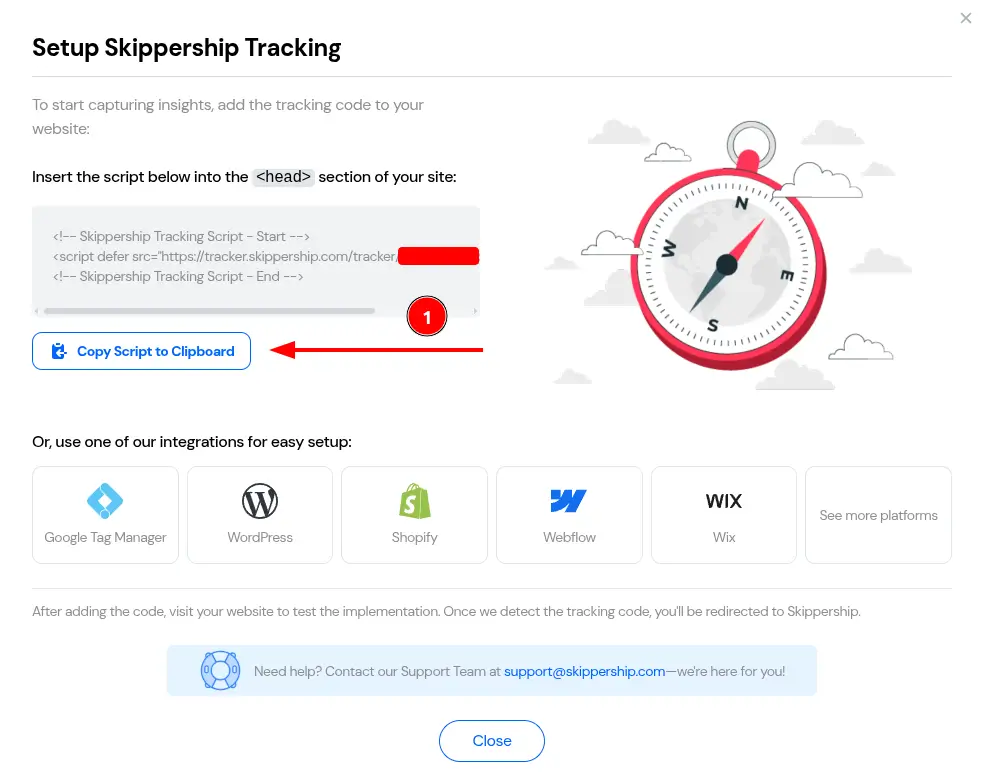
Go to your Skippership Dashboard and copy your tracking code from your Website setting by clicking on the gear icon:
![]()
<!-- Skippership Tracking Script - Start -->
<script defer src="https://tracker.skippership.com/tracker/YOUR_TRACKER_ID"></script>
<!-- Skippership Tracking Script - End -->
Important: Make sure to replace YOUR_TRACKER_ID with your actual tracker ID from your Skippership dashboard.
You'll paste this code into your WordPress site using the Simple Custom CSS and JS plugin in the next steps.
Install the Simple Custom CSS and JS plugin
Log in to your WordPress admin dashboard and navigate to Plugins → Add New.
Search for "Simple Custom CSS and JS" in the search box and install the plugin by SilkyPress.
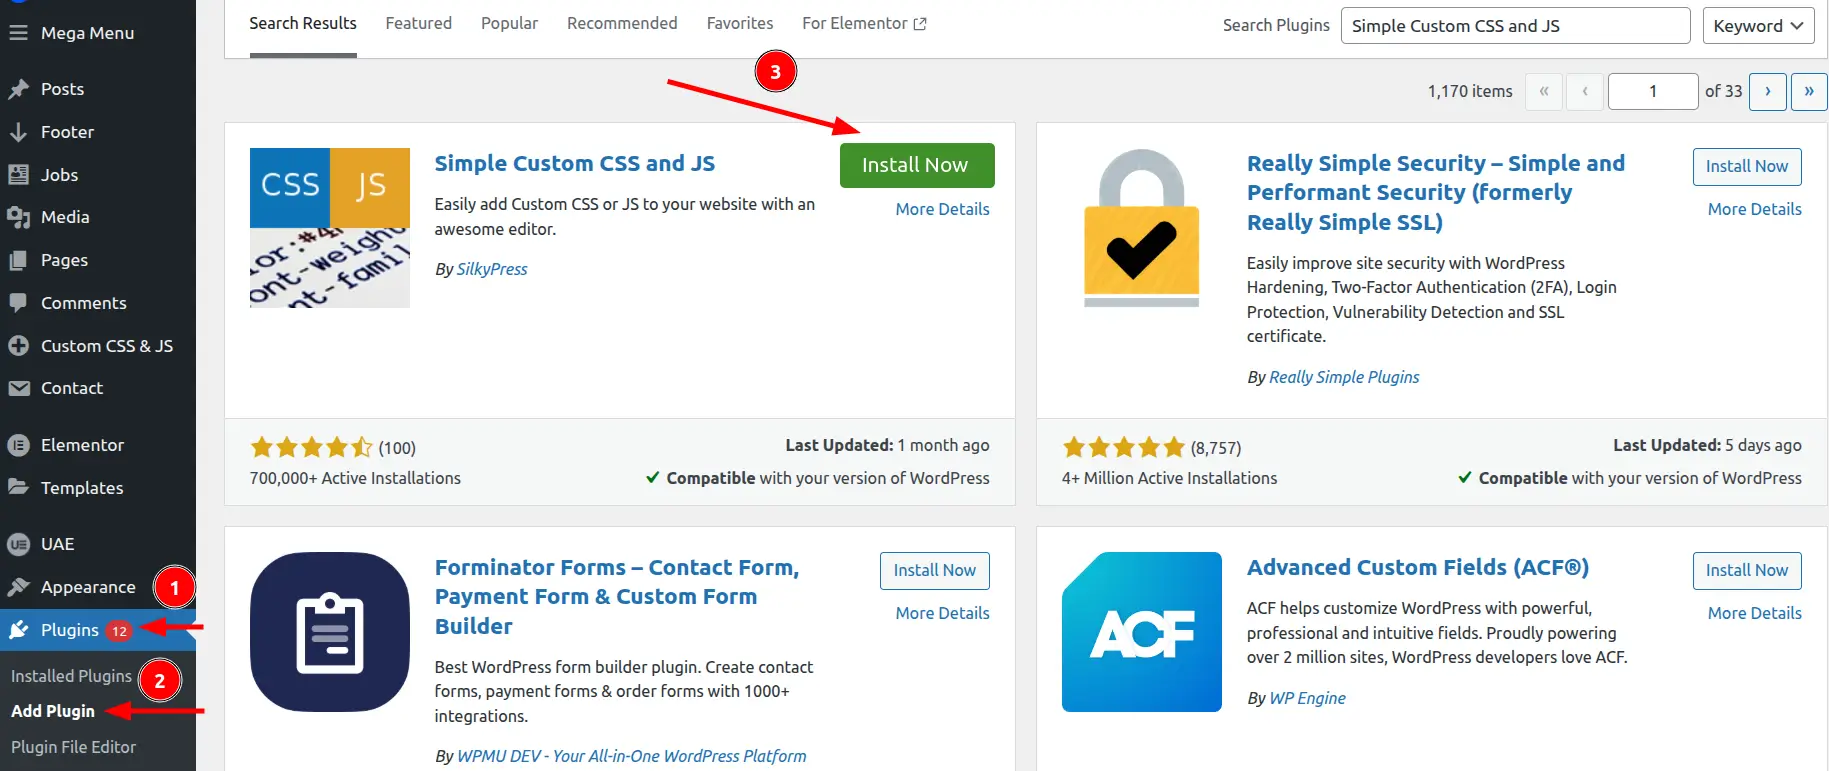
Click Install Now and then Activate the plugin.
Access the plugin settings
After activation, you'll see a new menu item called Custom CSS & JS in your WordPress admin sidebar.
Click on Custom CSS & JS to access the plugin's interface where you can add your tracking code.
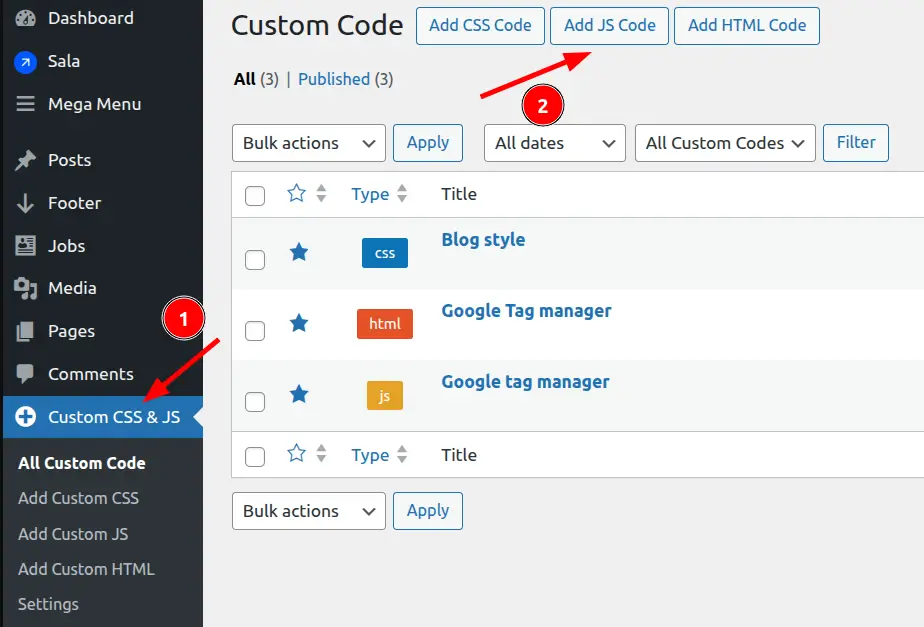
In the Custom CSS & JS interface, click the Add JS Code button to create a new code snippet.
This plugin allows you to add custom code without modifying your theme files directly.
Configure the tracking code
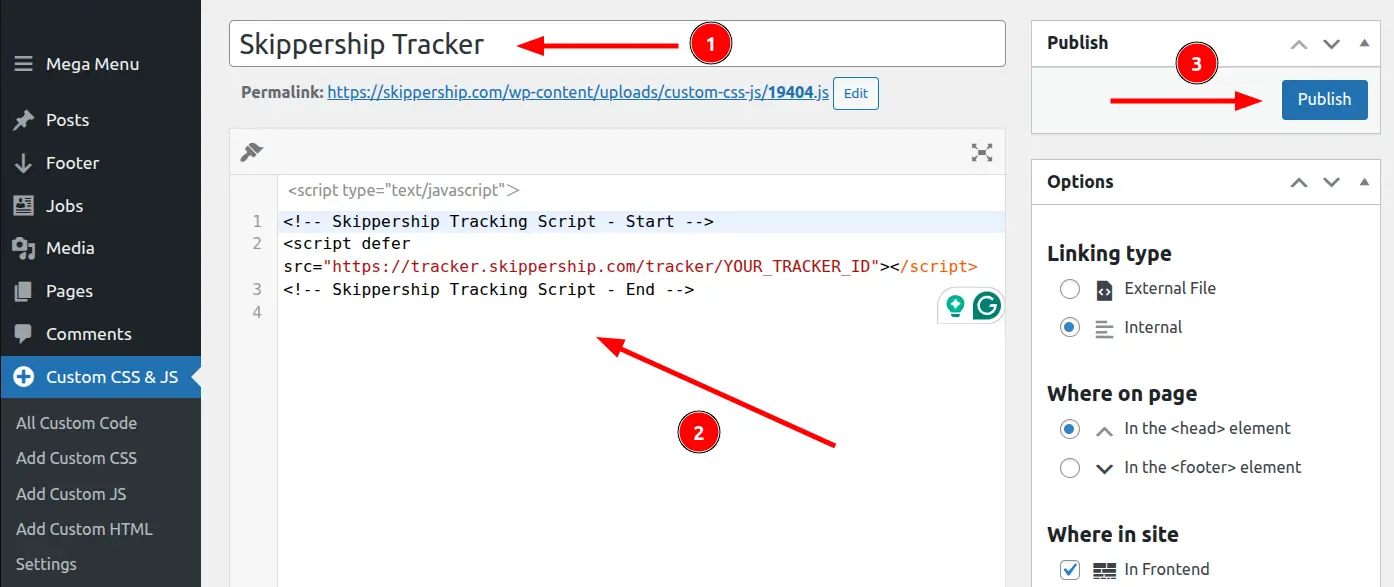
You'll see a form where you can configure your tracking code settings.
Fill out the form with the following settings:
- Name:
Skippership Tracker - Linking type: Select Internal
- Where on page: Select Header (to load the script in the
<head>section) - Where in site: Select Frontend (to load on your public website)
- Code: Paste your Skippership tracking code
<!-- Skippership Tracking Script - Start -->
<script defer src="https://tracker.skippership.com/tracker/YOUR_TRACKER_ID"></script>
<!-- Skippership Tracking Script - End -->
Important: Make sure to replace YOUR_TRACKER_ID with your actual tracker ID.
Click the Publish button to save and activate your tracking code.
The plugin will automatically add the code to your website's header section.
Your tracking code is now live on your WordPress website and will start collecting data immediately.
Clear cache:
If you're using a caching plugin (like W3 Total Cache, WP Fastest Cache, or WP Rocket), make sure to clear your cache and reload it to see the tracking code in action.
Verify the installation
Go back to your Skippership Dashboard, open the Recordings section, and visit your WordPress website.
If everything's set up correctly, you'll start seeing your first visitor sessions appear within a few minutes.
You can also check if the script is loading by opening your browser's developer tools (F12) and looking for the Skippership script in the Network tab.
You're done!
That's it! Skippership is now successfully installed on your WordPress website using the Simple Custom CSS and JS plugin.
You can start analyzing visitor behavior, track user interactions, and optimize your website experience with real session replay.
Pro tip: The Simple Custom CSS and JS plugin keeps your tracking code safe even when you update your WordPress theme, ensuring continuous tracking.
Benefits of Using Simple Custom CSS and JS Plugin
Why Use This Plugin?:
The Simple Custom CSS and JS plugin offers several advantages for adding Skippership to your WordPress site:
- Theme Independence: Your tracking code won't be lost when you update or change your WordPress theme
- Easy Management: Add, edit, or remove tracking codes through the WordPress admin interface
- Performance Optimized: The plugin caches your code for better performance
- No File Editing: No need to modify theme files directly, reducing the risk of breaking your site
- Multiple Codes: You can add multiple tracking codes if needed
Alternative Installation Methods
If you prefer not to use a plugin, you can also install Skippership by:
- Adding to your theme's
functions.phpfile - Using a child theme to maintain updates
- Adding directly to your theme's
header.phpfile
However, using the Simple Custom CSS and JS plugin is the recommended method as it's the safest and most maintainable approach.