Installing Skippership on your Shopify store is quick and easy. By the end of this guide, you'll have Skippership tracking code added to your store and can start recording customer sessions to understand how visitors interact with your products and checkout process.
Copy your tracking code
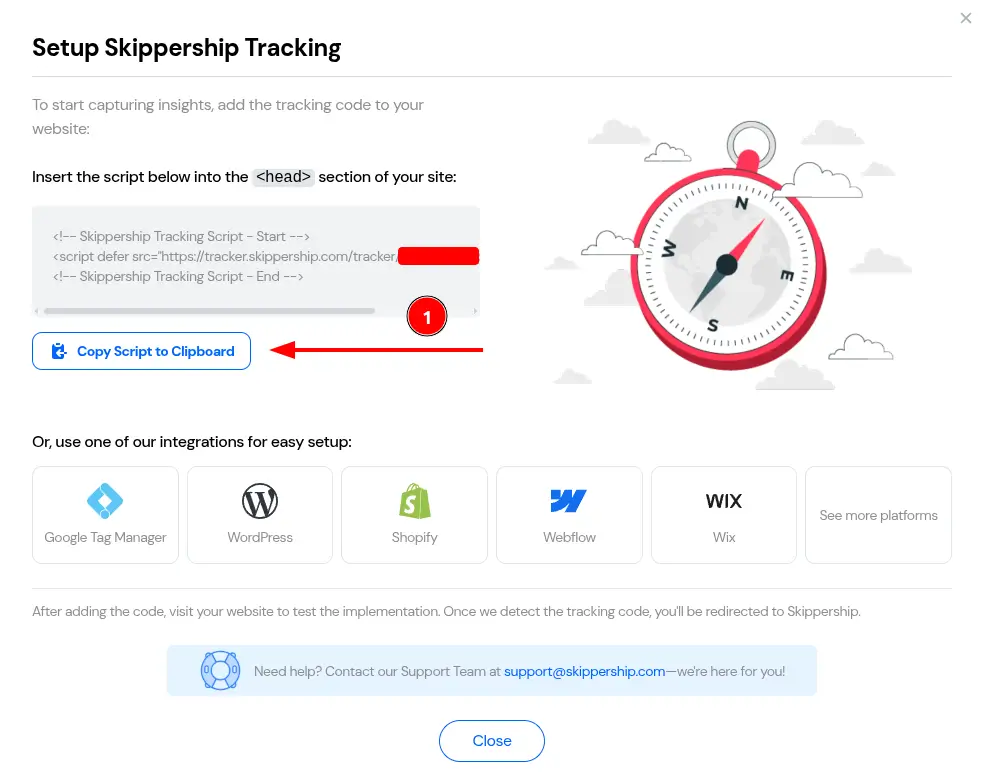
Go to your Skippership Dashboard and copy your tracking code from your Website setting by clicking on the gear icon:
![]()
<!-- Skippership Tracking Script - Start -->
<script defer src="https://tracker.skippership.com/tracker/YOUR_TRACKER_ID"></script>
<!-- Skippership Tracking Script - End -->
Important: Make sure to replace YOUR_TRACKER_ID with your actual tracker ID from your Skippership dashboard.
You'll paste this code into your Shopify theme in the next steps.
Edit your active theme
Log in to your Shopify Admin and navigate to Online Store → Themes from the left sidebar.
Find your currently active theme and click the Actions dropdown, then select Edit code.
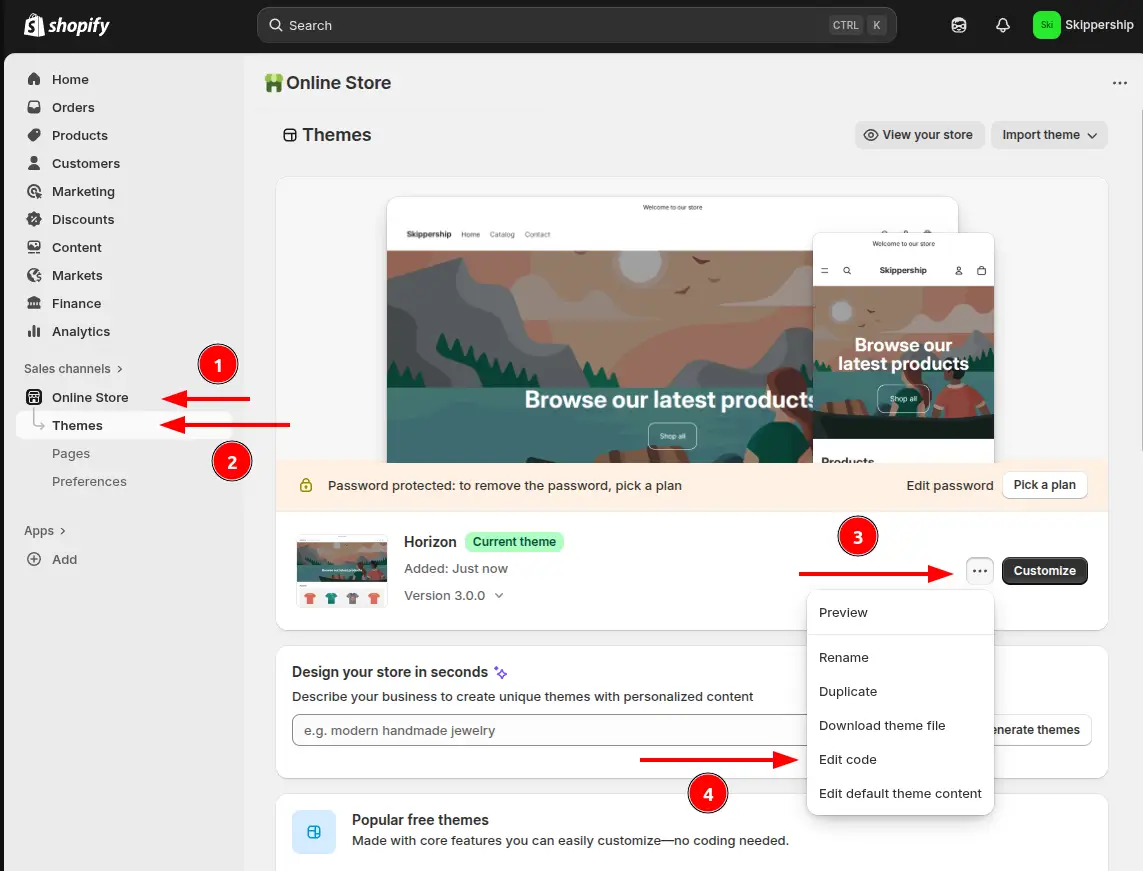
This will open the theme editor where you can modify your store's code.
Locate the theme.liquid file
In the theme editor, look for the Layout folder and click on theme.liquid. This is the main template file that controls the overall structure of your store.

This file contains the HTML structure that wraps around all your store pages.
Add the tracking code to the head section
In the theme.liquid file, find the <head> section and paste your Skippership tracking code just before the closing </head> tag.
<head>
  <!-- Your existing head content -->

  <!-- Skippership Tracking Script - Start -->
  <script defer src="https://tracker.skippership.com/tracker/YOUR_TRACKER_ID"></script>
  <!-- Skippership Tracking Script - End -->
</head>
Important: Make sure to replace YOUR_TRACKER_ID with your actual tracker ID.
Save your changes
Click Save in the top-right corner to save your changes to the theme.
Your tracking code is now live on your Shopify store and will start collecting data immediately.
Verify the installation
Go back to your Skippership Dashboard, open the Recordings section, and visit your Shopify store.
If everything's set up correctly, you'll start seeing your first visitor sessions appear within a few minutes.
You can also check if the script is loading by opening your browser's developer tools (F12) and looking for the Skippership script in the Network tab.
You're done!
That's it! Skippership is now successfully installed on your Shopify store.
You can start analyzing customer behavior, track cart abandonment, and optimize your checkout process with real session replay.
Pro tip: Consider setting up conversion tracking to see how customers move through your sales funnel from product pages to checkout completion.
Important Note About Shopify Checkout
Payment Information is Never Recorded:
For security and privacy reasons, Skippership does not record any payment-related information including credit card details, payment inputs, or sensitive checkout data. This ensures your customers' financial information remains completely secure.