Google Tag Manager (GTM) makes it super easy to add the Skippership tracking code to your site without manually editing your HTML. By the end of this guide, you’ll have Skippership set up on your website and can choose exactly where the script is active to start recording sessions and tracking behavior data.
Copy your tracking code
Go to your Skippership Dashboard and copy your tracking code from your Website setting by clicking on the gear icon:
![]()
<!-- Skippership Tracking Script - Start -->
<script defer src="https://tracker.skippership.com/tracker/YOUR_TRACKER_ID"></script>
<!-- Skippership Tracking Script - End -->
Important: Make sure to replace YOUR_TRACKER_ID with your actual tracker ID from your Skippership dashboard.
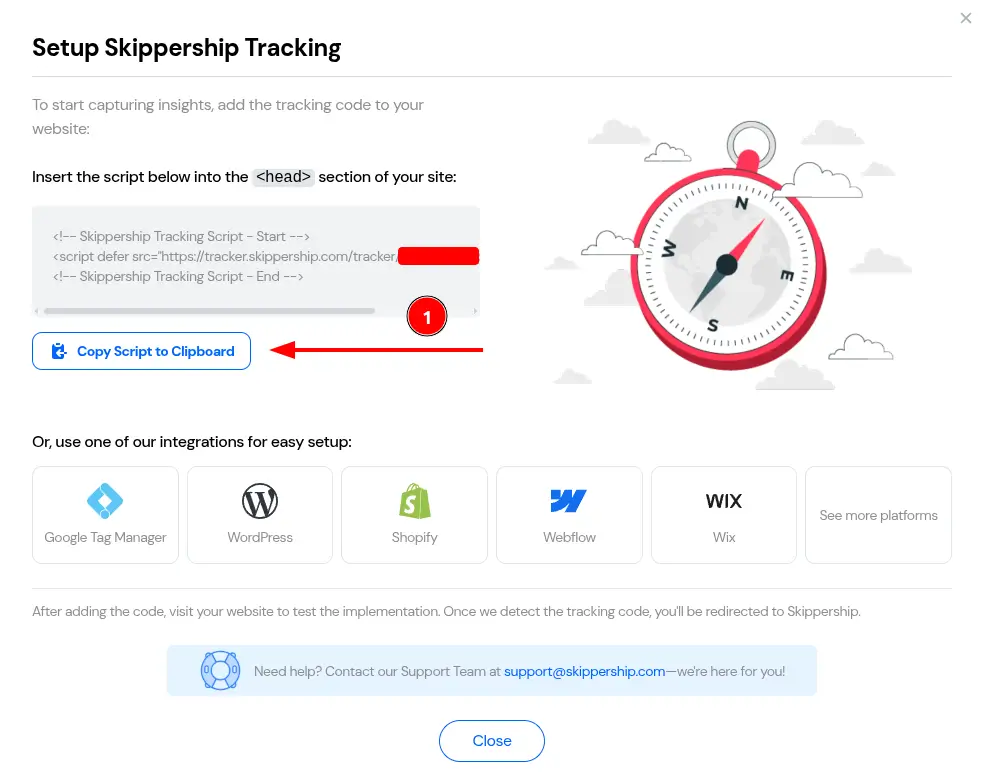
You'll paste this code into Google Tag Manager in the next steps.
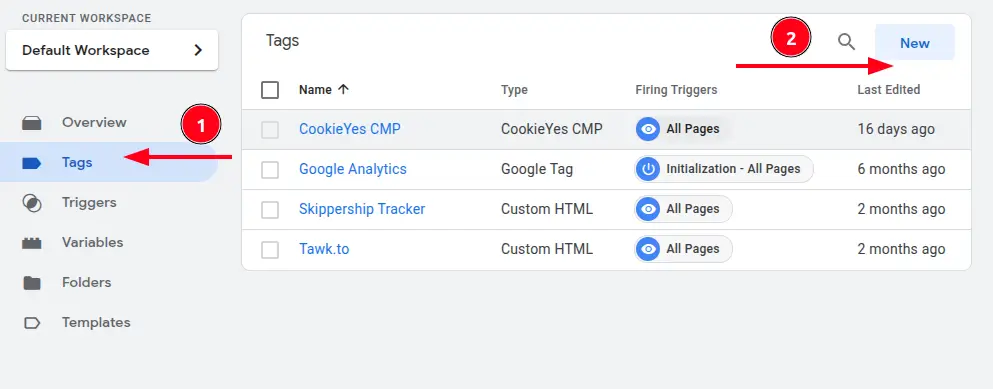
Set up Google Tag Manager
If you don't have a Google Tag Manager account yet, create one at Google Tag Manager.
Once you're signed in, select the container that belongs to your website.
Click Add a new tag to create a new tag.
Choose a Custom HTML tag
In the Tag Configuration panel, click anywhere in the tag area and select Custom HTML.
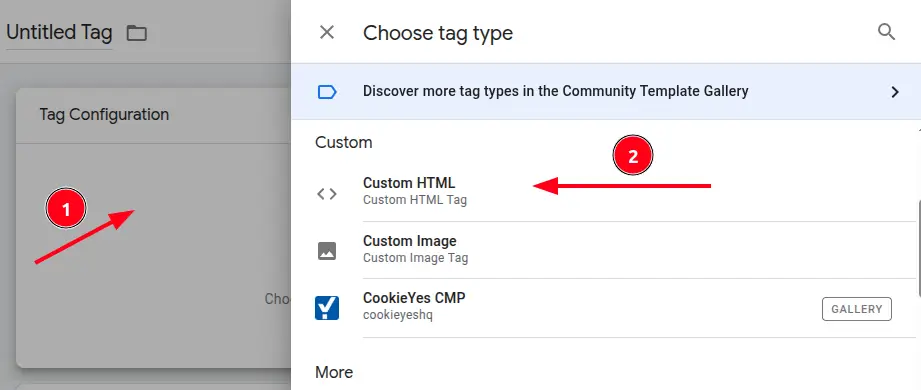
This option allows you to paste any custom script, like your Skippership tracking code.
Give your tag a name such as “Skippership Tracker.
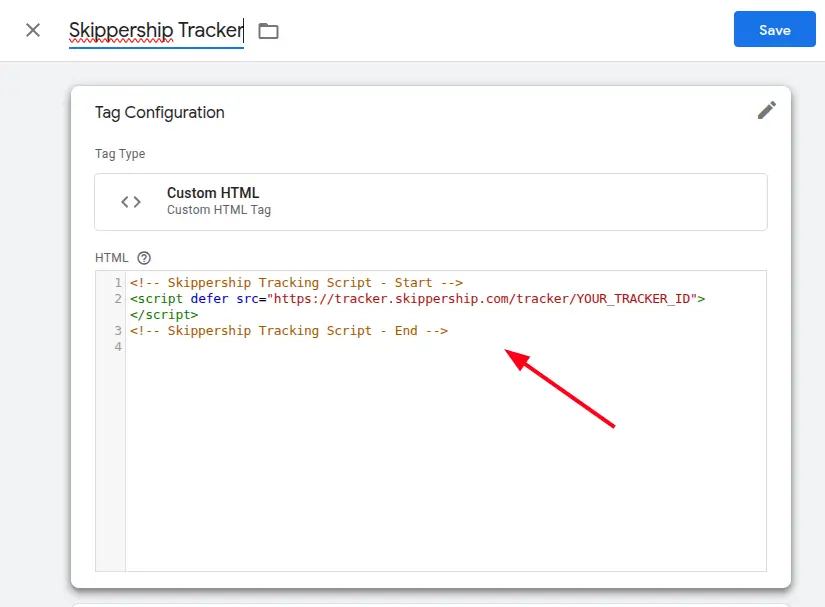
Paste your Skippership tracking code
Paste the code snippet you copied earlier into the HTML field.
Make sure it includes your correct YOUR_TRACKER_ID. It should look like this:
Set up the trigger
Scroll down to the Triggering section and click Add Trigger.
Choose All Pages so Skippership runs on every page of your site.
This ensures you capture all visitor interactions across your domain.
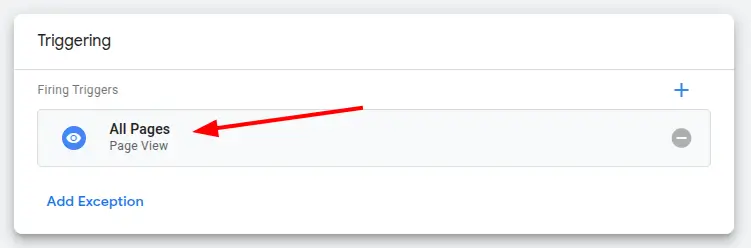
If you only want Skippership on specific pages, you can set up custom triggers later.
Save and publish your tag
Click Save in the top-right corner.
Name your tag something descriptive like Skippership – All Pages.
Back on the GTM dashboard, click Submit → Publish to push your changes live.
Once published, the Skippership script will automatically load on your website.
Verify the installation
Go back to your Skippership Dashboard, open the Recordings section, and refresh your site.
If everything’s set up correctly, you’ll start seeing your first visitor sessions appear within a few minutes.
You’re done!
That’s it, Skippership is now successfully implemented via Google Tag Manager.
You can skip any final confirmation steps. Your setup is complete, and session tracking is now active.