Installing Skippership on your Magento website is quick and easy. By the end of this guide, you'll have Skippership tracking code added to your website and can start recording visitor sessions to understand how users interact with your pages.
Copy your tracking code
Go to your Skippership Dashboard and copy your tracking code from your Website setting by clicking on the gear icon:
![]()
<!-- Skippership Tracking Script - Start -->
<script defer src="https://tracker.skippership.com/tracker/YOUR_TRACKER_ID"></script>
<!-- Skippership Tracking Script - End -->
Important: Make sure to replace YOUR_TRACKER_ID with your actual tracker ID from your Skippership dashboard.
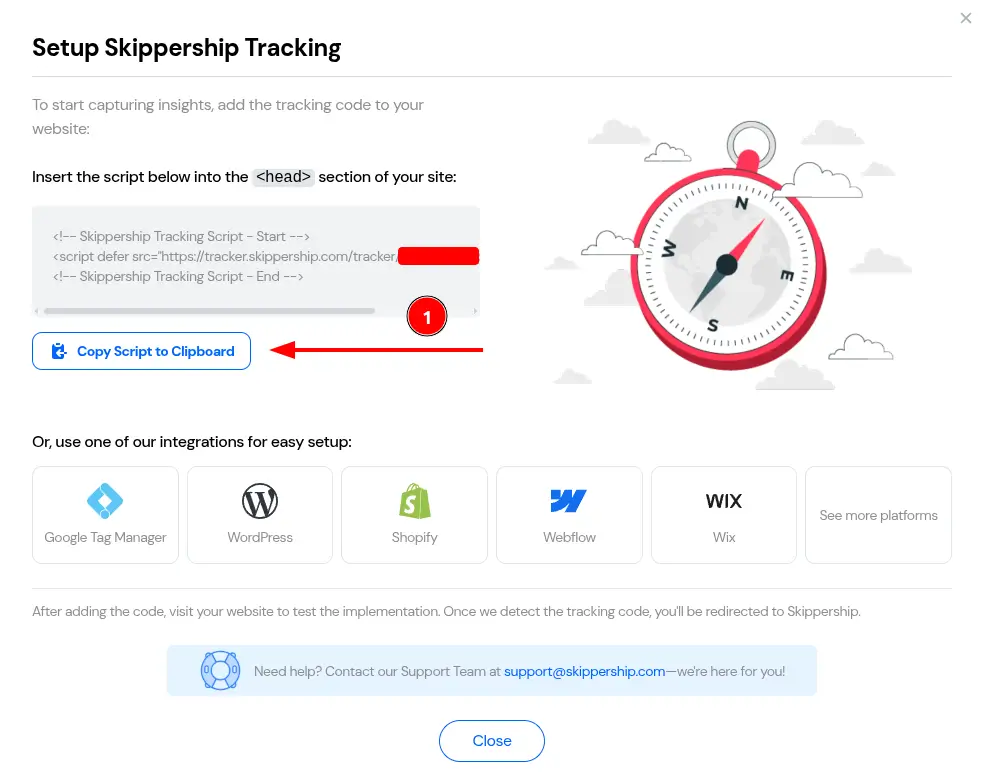
You'll paste this code into your Magento website in the next steps.
Access Magento Admin Panel
Log in to your Magento Admin Panel using your administrator credentials. Once logged in, you'll see the main navigation menu on the left side of the screen.
From the left navigation menu, click on Content to expand the content management options. In the Content submenu, click on Configuration to access the theme configuration settings.

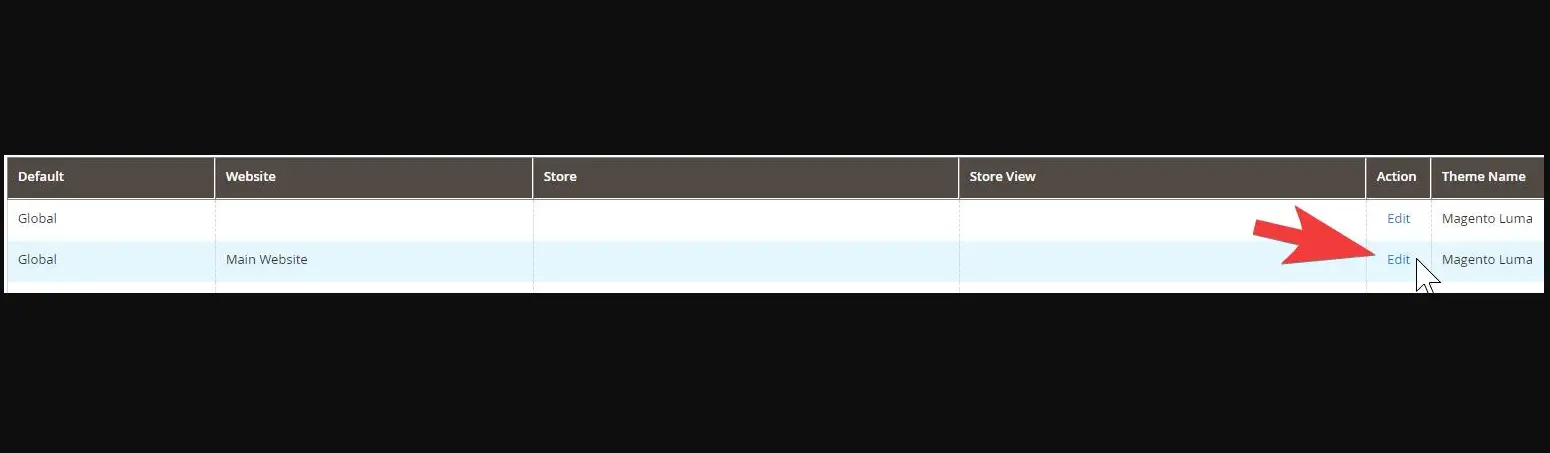
Navigate to Edit Configuration
On the theme configuration page, you'll see a table with different themes and their scope settings. Find the row for "Main Website" and click the Edit link in the Action column.
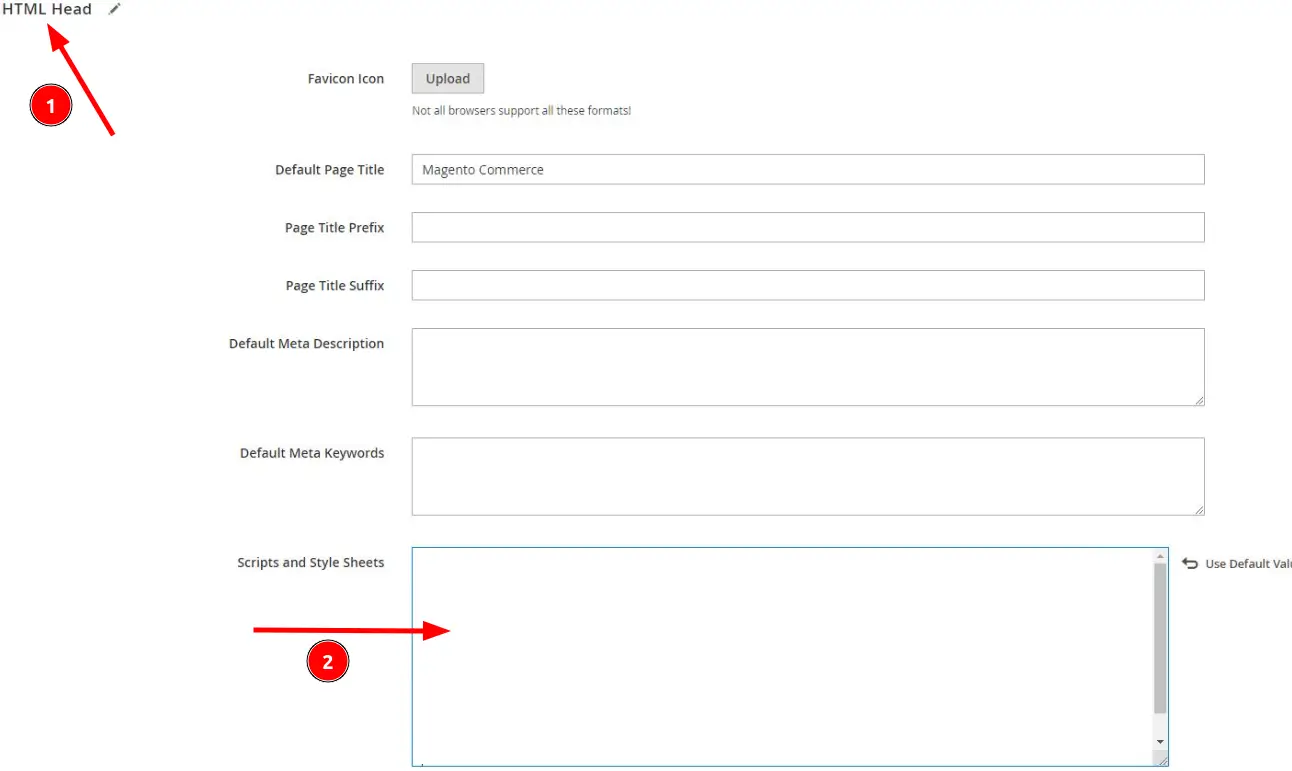
Expand HTML Head and Add Tracking Code
First, click on the HTML Head section to expand it. This is required to access the Scripts and Style Sheets field.
Once the HTML Head section is expanded, scroll down to find the Scripts and Style Sheets field. Paste your Skippership tracking code into this field:
<!-- Skippership Tracking Script - Start -->
<script defer src="https://tracker.skippership.com/tracker/YOUR_TRACKER_ID"></script>
<!-- Skippership Tracking Script - End -->
Important: Make sure to replace YOUR_TRACKER_ID with your actual tracker ID from your Skippership dashboard.
After pasting your code, click the Save Configuration button to save your changes.
Verify the installation
Go back to your Skippership Dashboard, open the Recordings section, and visit your Magento website.
If everything's set up correctly, you'll start seeing your first visitor sessions appear within a few minutes.
You can also check if the script is loading by opening your browser's developer tools (F12) and looking for the Skippership script in the Network tab.
You're done!
That's it! Skippership is now successfully installed on your Magento website.
You can start analyzing visitor behavior, track user interactions, and optimize your website experience with real session replay.
Pro tip: Consider setting up conversion tracking to see how visitors move through your website from landing pages to key actions.
Important Note About Data Privacy
Privacy and Security:
Skippership is designed with privacy in mind. We do not record sensitive information like passwords, credit card details, or personal data. All recordings are anonymized and used solely for website optimization purposes.